

|
|
|
||||||||
|
|
|||||||||
| Home | Forums | Register | Gallery | FAQ | Calendar |
| Retailers | Community | News/Info | International Retailers | IRC | Today's Posts |
 |
|
|
Thread Tools |
|
|
#1 |
|
Harvester of Noobs' Sorrow
|
P90- integrated hop-up tracer mod [56kDEATH]
this is going to be a how-to on a HUTU project i just finished for sabinn.
original request thread is located here -> http://www.airsoftcanada.com/showthread.php?t=132727  on the start of this project the intent was to have a hopup tracer mode that ran off the main battery like the other guns i have with me. unfortunately due to an issue with the gearbox that makes the motor draw more current than it should, i had to come up with a new solution that would in essence function in a similar way. the initial idea of running the LEDs off the main batt was so that the LEDs would only light up when the gun was cycling. the reason behind this was to reduce the output of light from the gun as much as possible. anyone who has used a TM tracer or similar silencer style tracer unit knows that though it can put out really bright tracers, it does have a drawback that i would consider a double edged sword. during a night game where tracers are normally used, they can be really useful for marking targets and directions. unfortunately due to the design of the silencer tracer unit, it lets out quite the bright flash out the front end toward your target. if you are playing against players with NVGs, you basically become a beacon in the darkness. tracer mags don't leak light out for all to see, yet their drawback is that the source of light for the tracer rounds is so far from the barrel, that once you do start shooting the BBs being fed have already dimmed. it takes a good spray of BBs before barely glowing BBs start coming out. so for me tracer mags are a waste of money. i personally think that a hopup tracer system is the best way to go. firstly, it's much brighter than tracer mags, and i would argue as bright as a silencer tracer units. second, due to the use of UV LEDs instead of a flash-strobe as in silencer units, even if some of the light leaks out a seam in the AEGs body, they are practically unnoticed by non-NVG users. third, they are far cheaper than both silencer and mag tracer units, and simple to maintain/repair. so, on with the mod! here is the basic layout i have for this P90. 9v battery, an always on micro switch, some wires, LEDs, some plastic for the LED housing and some Lexan for the hopup main housing. 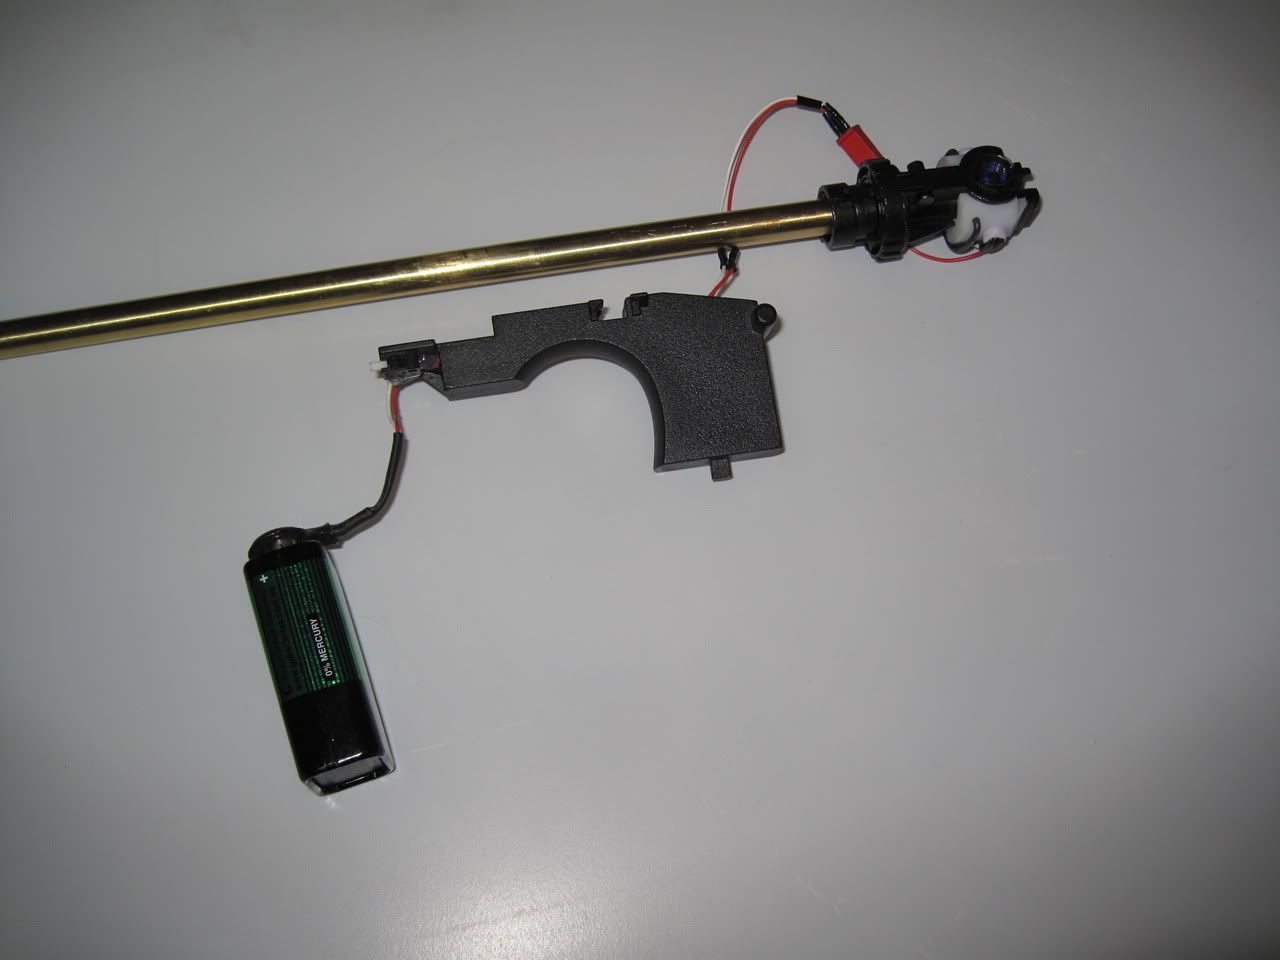 the first thing i worked on was the LED housing. i made a quick sketch of the hopup housing and its dimensions before dropping a plastic block into my Mill for machining. sorry i dont have any pics of the process while making the LED housing, as my camera's memory card get corrupted and had to be formatted. 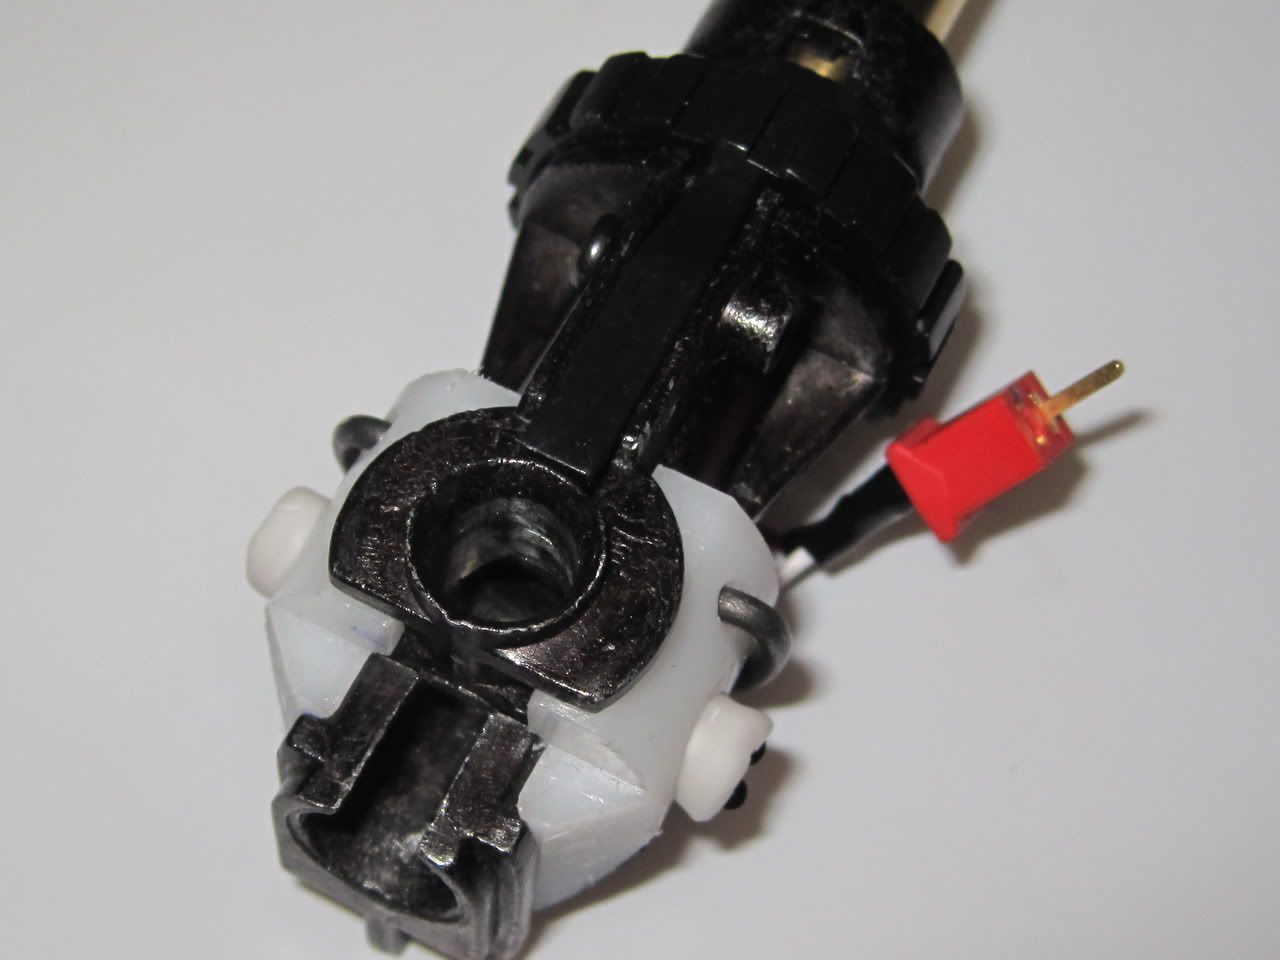 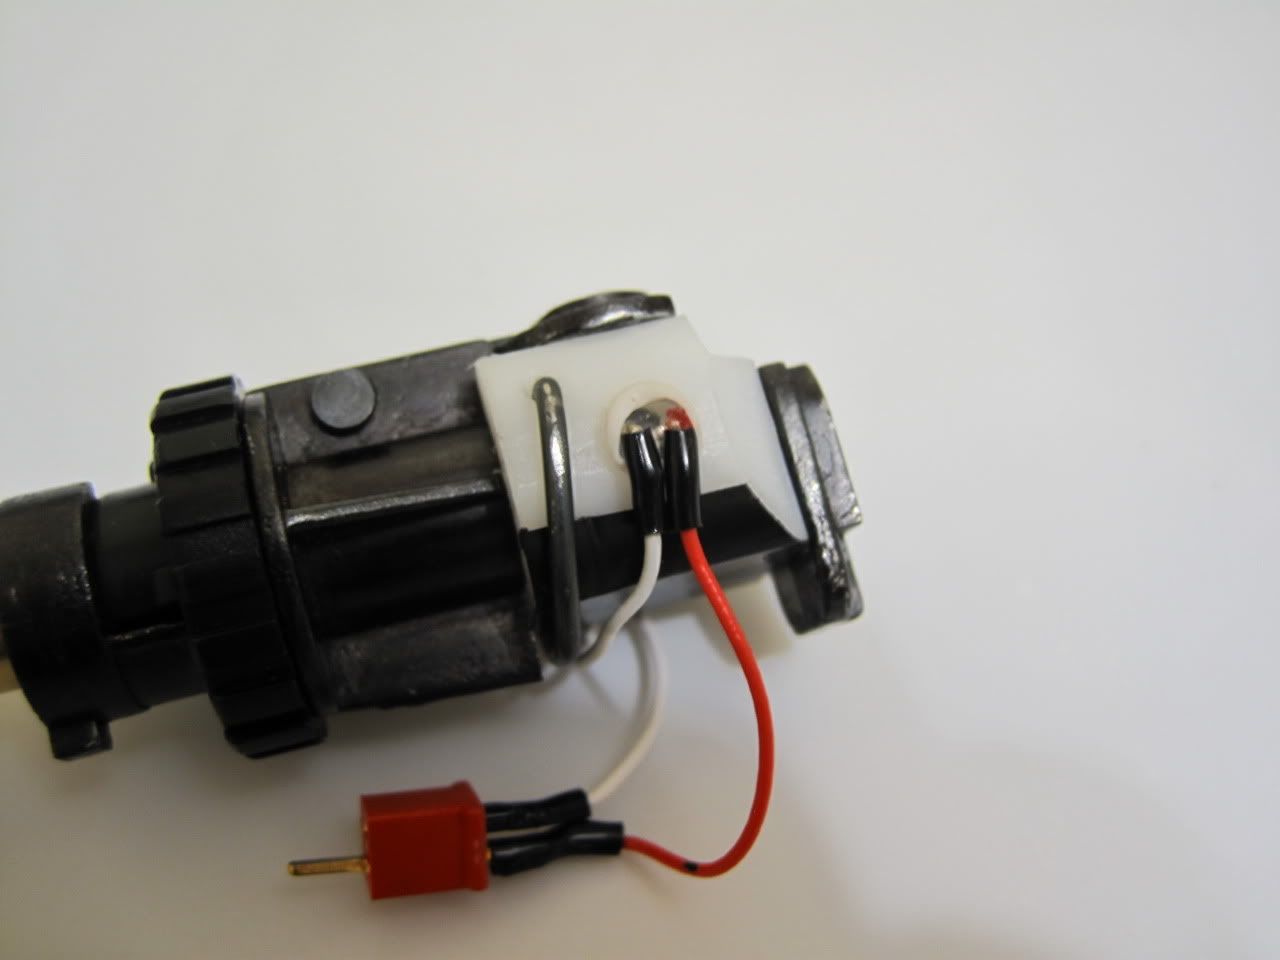 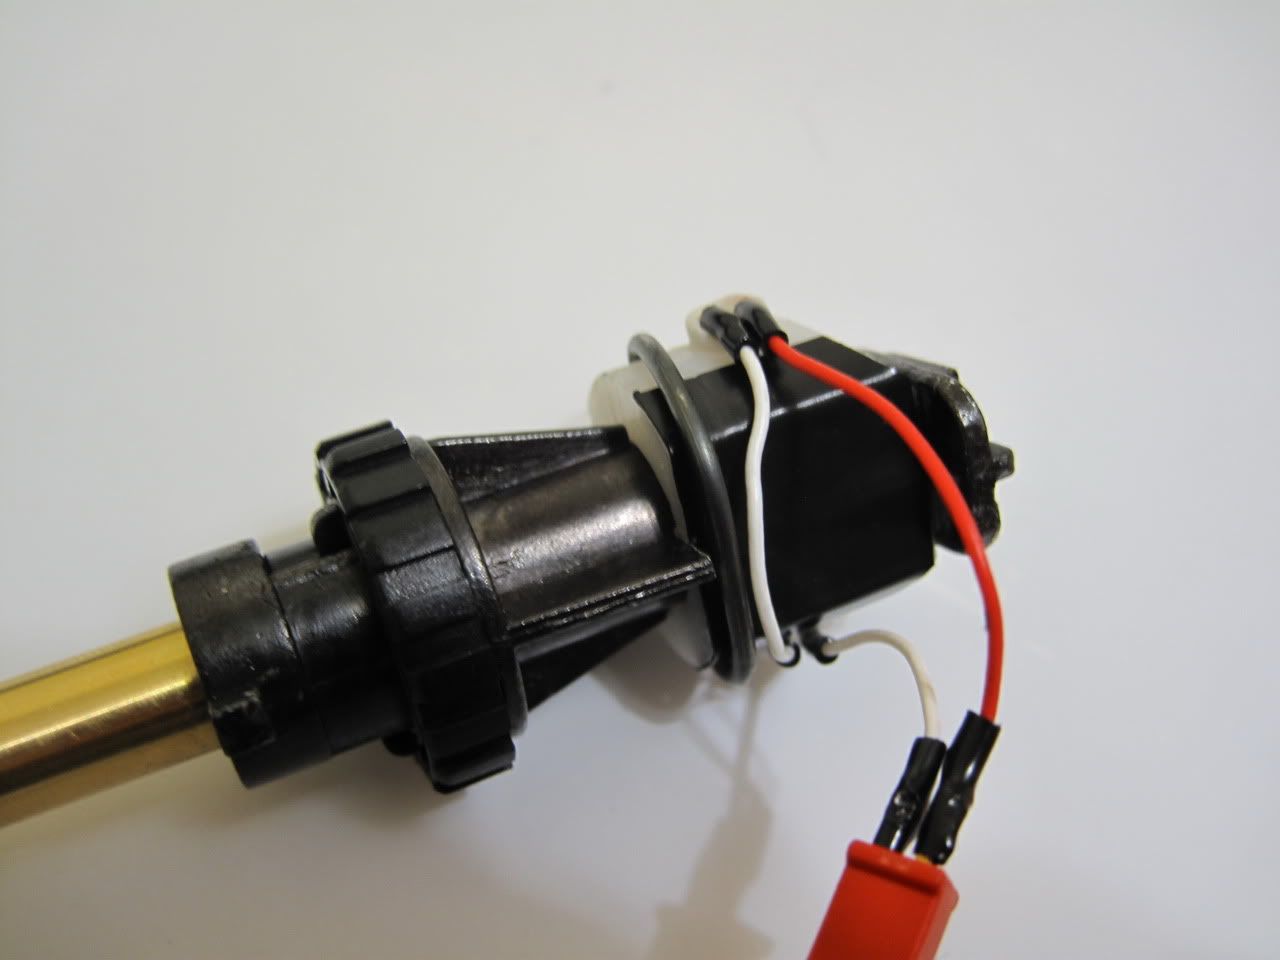 initially the LED housing was a one piece part, but it ended up snapping in two. not a big deal as this made it easier to install by using a bit a tie wire to keep it on the hopup housing.  the next step was to figure out exactly where to place the LEDs and drill the holes for them in both the LED housing as well as the hopup main housing. most HUTUs that i have seen simply have holes drilled on the sides of the hopup housing and have the LEDs glued in place covering the hole. im not really a fan of that so i came up with the idea of covering the holes on the side of the housing with Lexan plugs that act as little windows. the tricky part was to shape the Lexan so it would have a curved face with the same diameter as the inside bore of the hopup chamber. the reason for this is simple. so that the inside surface could be kept smooth so it would not catch, scratch or jam BBs. it also means that the tracer mod can be removed while the holes on the hopup housing remain plugged. 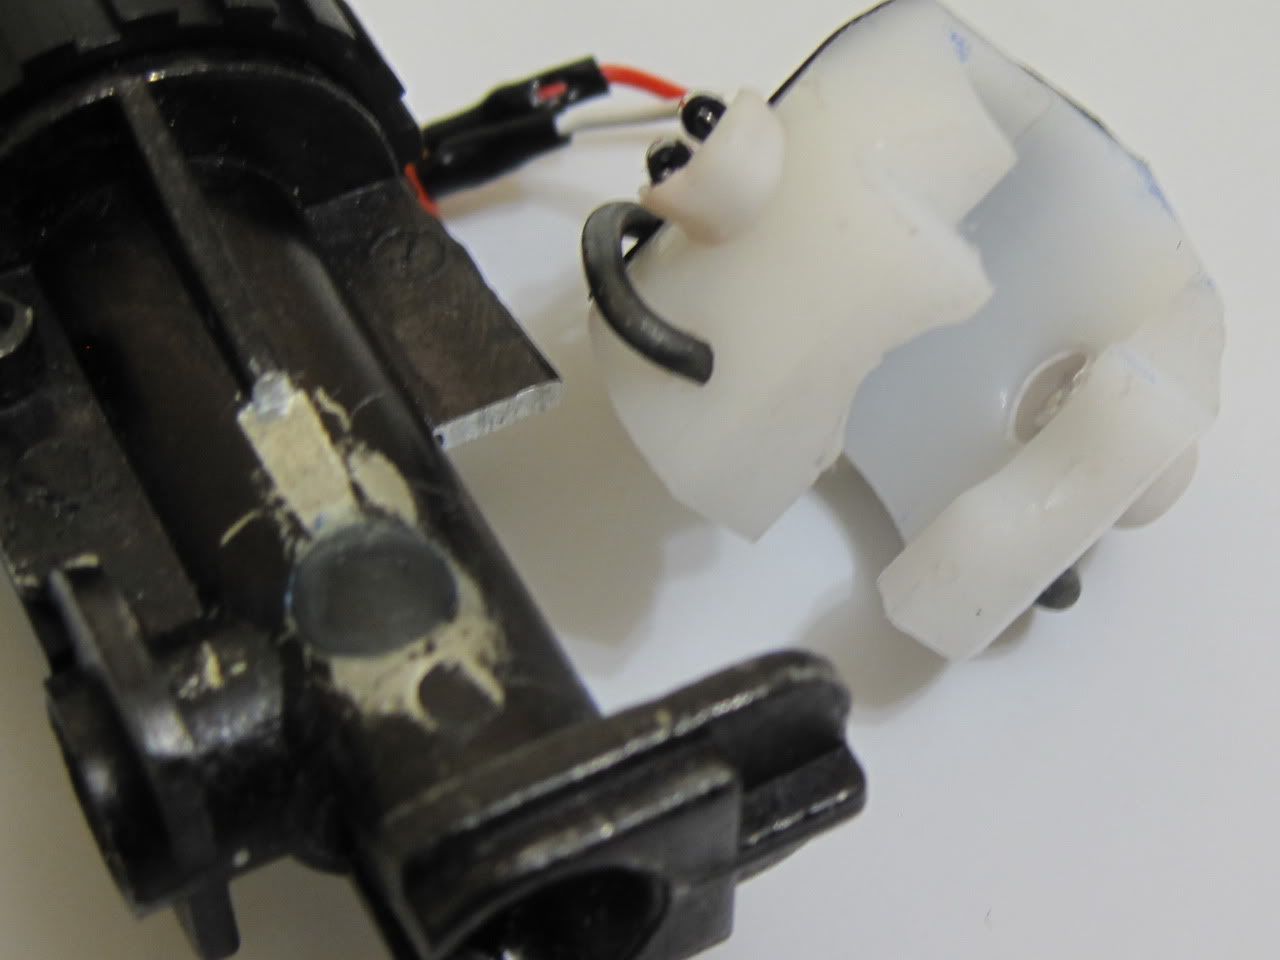  of course some sections of the hopup housing needed to be machined off so that the LED housing could fit, as seen in the pic above. after the housing and the holes were drilled and plugged i started to modify the LEDs to be as compact as possible. these LEDs are the focused type so i had to remove the whole front section of the acrylic down to .015 inch from the tip of the diode. once the LEDs were cut to length i polished the cut surfaces until they were perfectly clear. at this point i started to hook up the wiring to power the LEDs off the motor. i soldered a 120ohm 1/4 watt resistor on the positive line and wired the LEDs in parallel. the + end of the LEDs were wired to the + of the motor and the - to the - of the motor. at first it worked fine, but quickly things went wrong. as i said at the start, there is an issue with the gearbox and the motor draws a much higher current than it normally would(sabinn, get that looked after if you want your motor and your batteries to last), so the LEDs wouldn't get enough juice to light up, but the resistor would burn out. since the gearbox issue was to be left alone, i had to sit down and figure out a different way to have the LEDs work and only during firing. the solution i came up with was to use a separate battery and some sort of switch. lucky for me i had stopped by Active Surplus during the weekend and had picked up an assortment of switches. one set of switches turned out to suit my need perfectly. it's a tiny little two setting switch. depending on how it was wired it was either always off or always on. here's the little guy. i removed one of the terminals as i only needed it on the always on mode. it fit nicely right under the forward lip of the trigger.  now i had to figure out how i would keep the switch depressed. thankfully the plastic body of the P90 can be cemented with modeling cement, so i quickly made a stopping block out of lexan and cemented it ahead of the end of the trigger on the inside of the P90's shell. 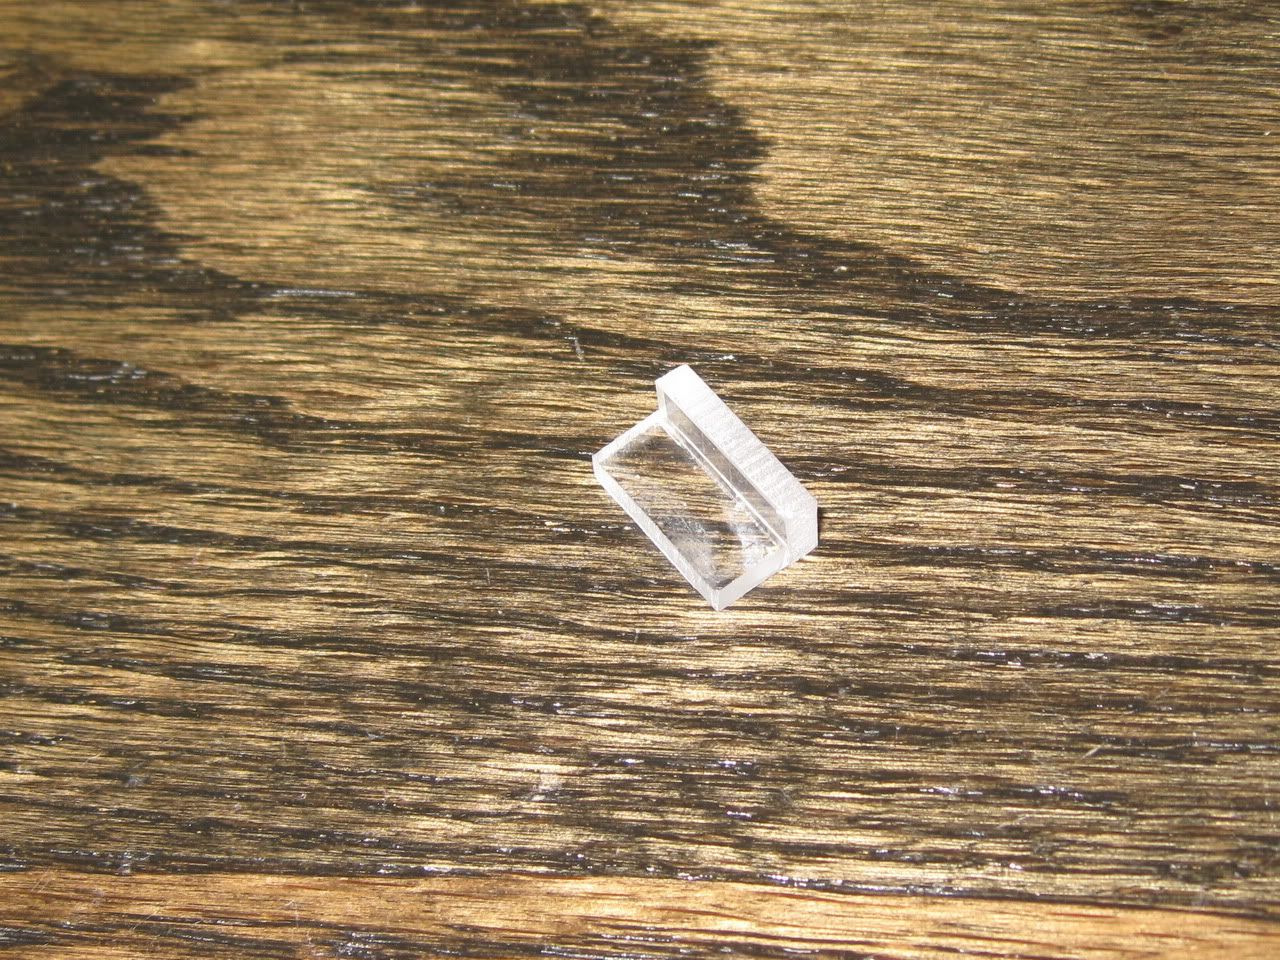  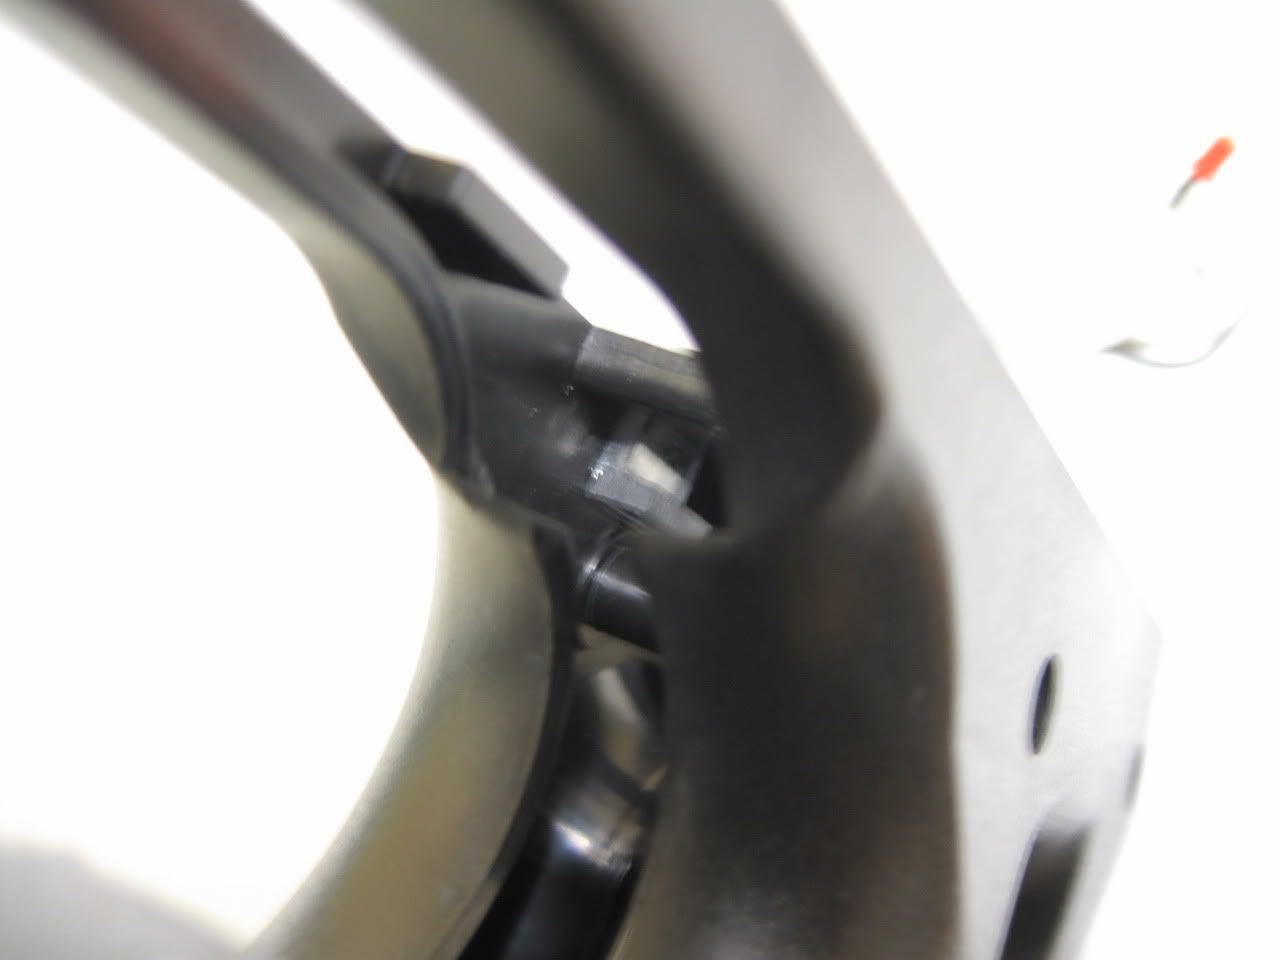 now when the trigger is released the switch shuts off the power and the LEDs.  another lucky break was that a 9v battery fit snug into the shell just under the switch area.  now that i had a power source and a switch to control the LEDs i was ready to wire it all up together. the nice thing about being able to use the 9v battery, is that i don't need to use a resistor and it can be easily replaced once drained and are fairly cheap. i was going to use LR44 button batteries if the 9V didn't fit, at almost $5 each and needing 6 to power the LEDs, i'm thankful i didn't need to use them. now i start to wire everything together, and set the LEDs in series. i hook up the battery's + to one terminal on the switch, then from the second terminal to the + end of the LEDs. the - wire went directly from the battery to the - end of the LEDs. i routed the wired through the trigger by drilling 4 5/64 holes. two at the front by the switch and two at the back leading to the LEDs.  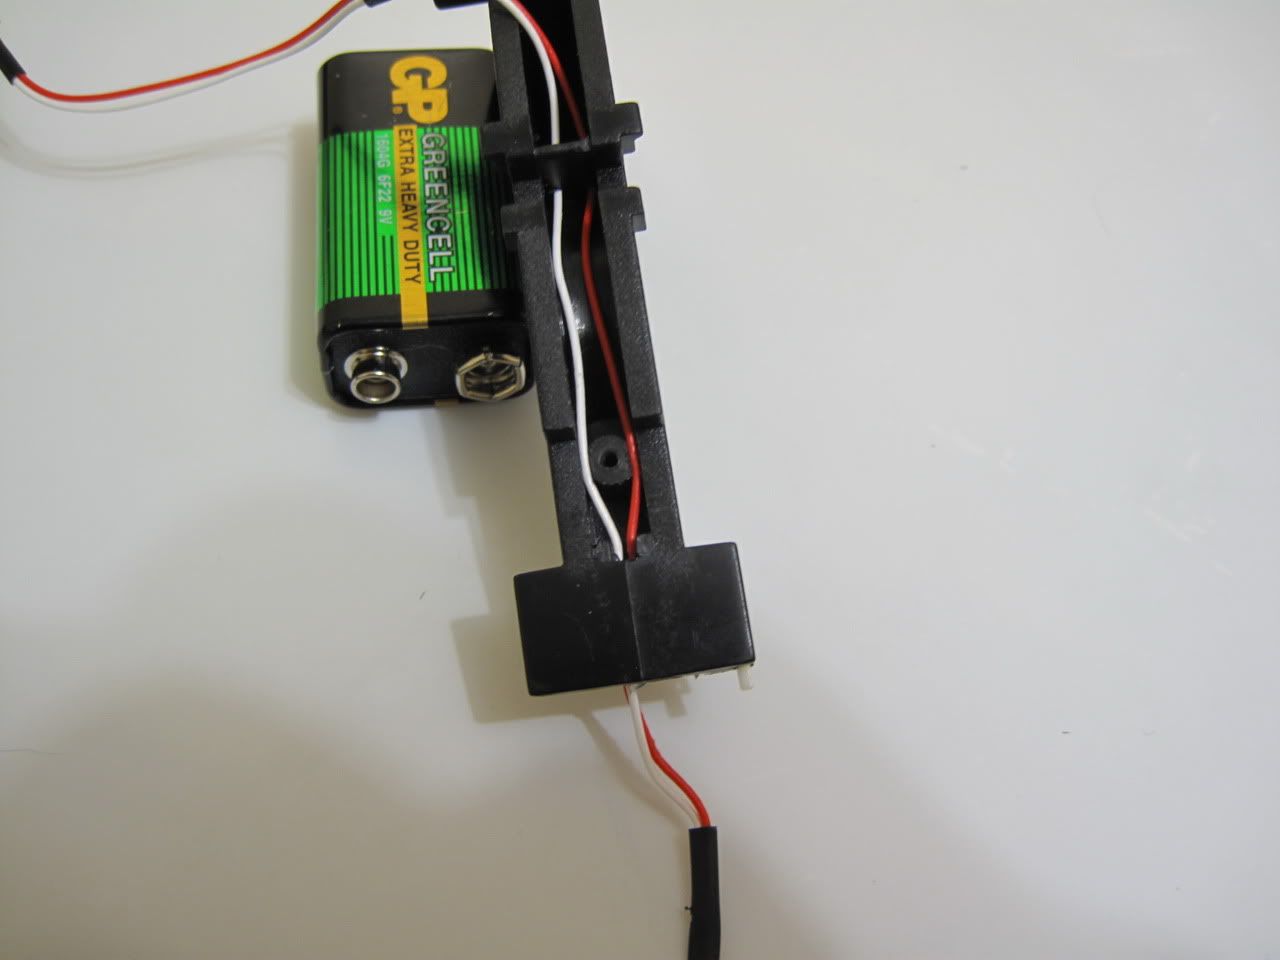 i used some hot glue to add extra support around the switch and the connected wires. 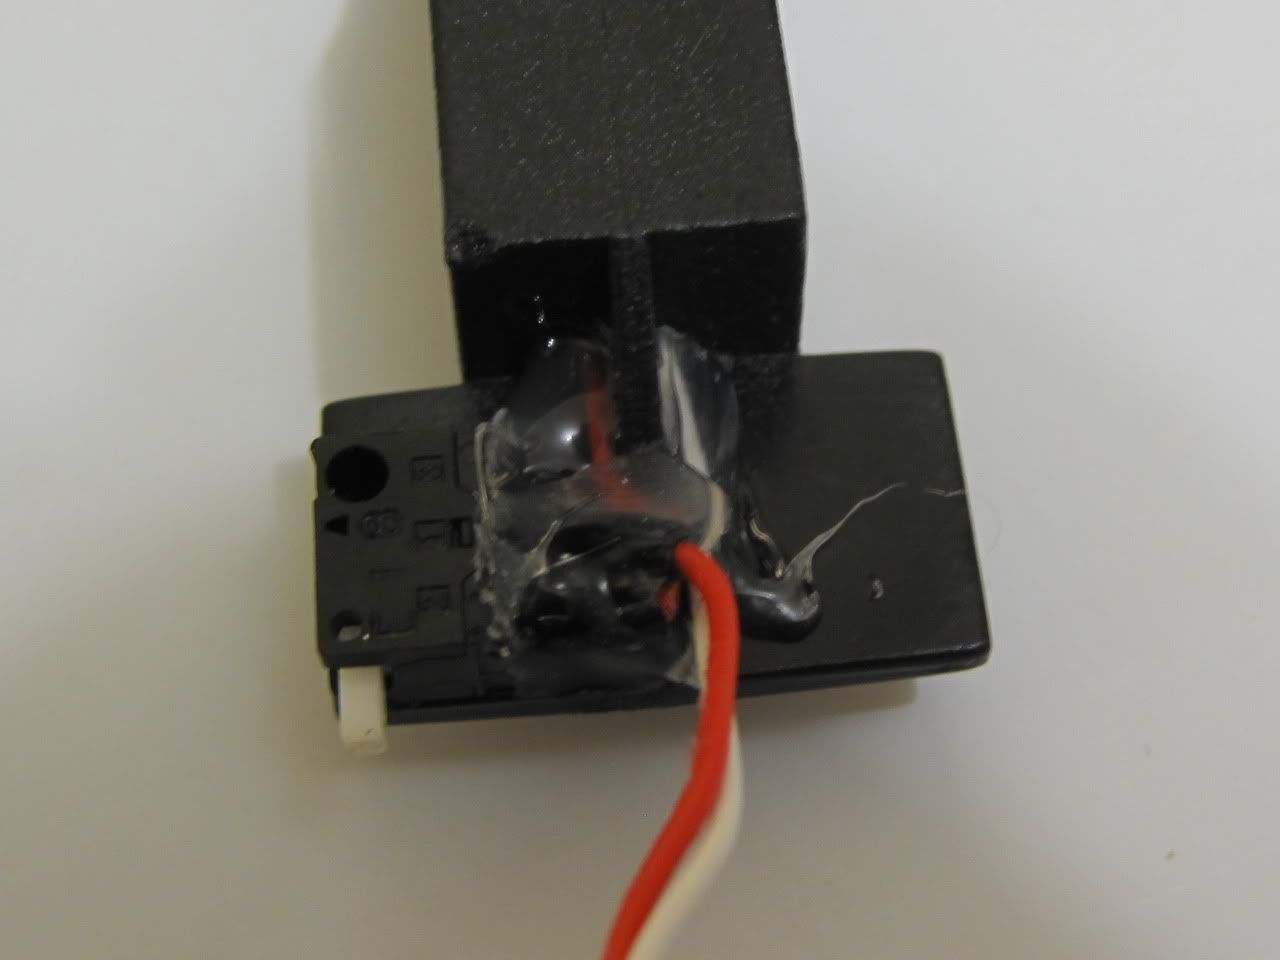 with the LEDs joined in series, i put some shrink tubing around them so they would fit snug in the holes drilled in the LED housing. i also use a micro DEANS connector so the upper with the LEDs could be removed and disconnected from the lower which holds the switch and battery.  that is more or less it for this mod. and like i had originally thought, both on semi and full auto every round is lit up, first to last. i think what took the longest to do considering how little time i actually had to work on this, was the LED housing. other than that, this was really easy. now for some Video! wow.. 5am already..lol i'll most likely be editing some stuff and rephrasing somethings later.. im really sleepy and glad i was able to complete this mod for Sabinn.. now i want my own P90.. >_<.   look who was helping me with taking pictures.lol 
__________________
Weapons Technician / Gunsmith Don't look at me, I don't know, lol ¯\(°_o)/¯. |
|
|

|
|
|
#2 |
|
takagari
|
Thanks for the write up. I like the switching method. A bit confused on how you set it up? The trigger needs to be fully depressed to activate it?
Will it work in partial pull? I like the setup. Not sure how its positioned as the trigger has a lot of travel and that switch looks like it doesn't? Thanks for the write up. Good to know a 9v will fit in there 
__________________
Eddie Creek, MB Airsoft Field, Valken Dealer, Local Age Verification [COLOR="DarkOrange"][B] |
|
|

|
|
|
#3 |
|
Najohn
|
Very impressed
|
|
|

|
|
|
#4 | |
|
Harvester of Noobs' Sorrow
|
Quote:
__________________
Weapons Technician / Gunsmith Don't look at me, I don't know, lol ¯\(°_o)/¯. |
|
|
|

|
|
|
#5 |
|
takagari
|
ahhh push off
Brilliant. Never even thought of that  Thanks for the write up. You sir need to start making and selling tracer hopups. Sadly Mine will involve drilling holes. inserting led's. sanding them round and going from there. How ever I may be getting a metal p90 hopup. so I may have to run it through a machine EDIT: Did you split the body to get the battery in there? That pictures a bit misleading?
__________________
Eddie Creek, MB Airsoft Field, Valken Dealer, Local Age Verification [COLOR="DarkOrange"][B] |
|
|

|
|
|
#6 | |
|
Harvester of Noobs' Sorrow
|
Quote:
__________________
Weapons Technician / Gunsmith Don't look at me, I don't know, lol ¯\(°_o)/¯. |
|
|
|

|
|
|
#7 |
|
takagari
|
Really?
Hmm I have mine apart now and so happen to have a second body to play with. Will give it a try. I presume you could just cut a hole in the top as well and slip it through a hole? The trigger/selector will come out without splitting. you need to remove the small plate on the top front of the trigger. Pop it out than the assembly pops out  But thank you for the tip. I'll give it a trip.
__________________
Eddie Creek, MB Airsoft Field, Valken Dealer, Local Age Verification [COLOR="DarkOrange"][B] |
|
|

|
|
|
#8 |
|
Here is the gun with the HUTU on/off. This is to illustrate how effective this mod is and that there is zero light bleeding from the gun. Absolutely no muzzle flare.
The following photo specs are for the camera nerds. In a nutshell this means the room I look the pictures in was almost black, a single computer monitor was the only light source. A good camera can make any room look bright ;] shutter 1" Aperture f/6.3 iso3200   ------------------------------------------------------   ------------------------------------------------------   1798 1799 1800 1801 1802 1803 shutter 1" Aperture f/5.6 iso3200   shutter 1" Aperture f/10 iso3200  Straight down the barrel. Even with no bb's I was still nervous with my camera :P shutter 1" Aperture f/8 iso3200  The last photo the HUTU is turned on. This illustrates that with just a few degrees to the side there is no light bleed. Remember, the room I'm taking these photos in is nearly black (which is why the HUTU looks so bright in the previous photos). Dynamo is pro. Quality work, good communication, great guy. I don't imagine this mod could have gone any better for me 
|
|
|
|

|
|
|
#9 |
|
Najohn
|
We want test fire videos! Go go
|
|
|

|
|
|
#10 |
|
Wouldn´t it be easier if you put the light wires connected to the trigger switch instead?, I did something similar that worked this way for my P90 LPEG, and worked fine, no worries about switches and such, you press the trigger, the LED lights all the barrel!!, aniway a nice MOD (envy kills me, I must assume
 ). ).
|
|
|
|

|
  |
|
||||||
| Bookmarks |
|
|
 |